Self hosting
Learn how to host MediaLit API
This guide explains how to self-host MediaLit with an S3-compatible storage provider.
Requirements
- Two buckets: one dedicated to private files and one to public files.
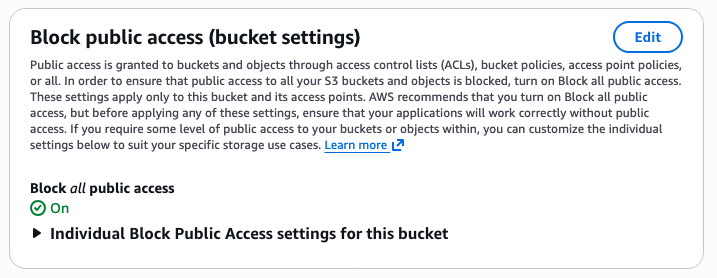
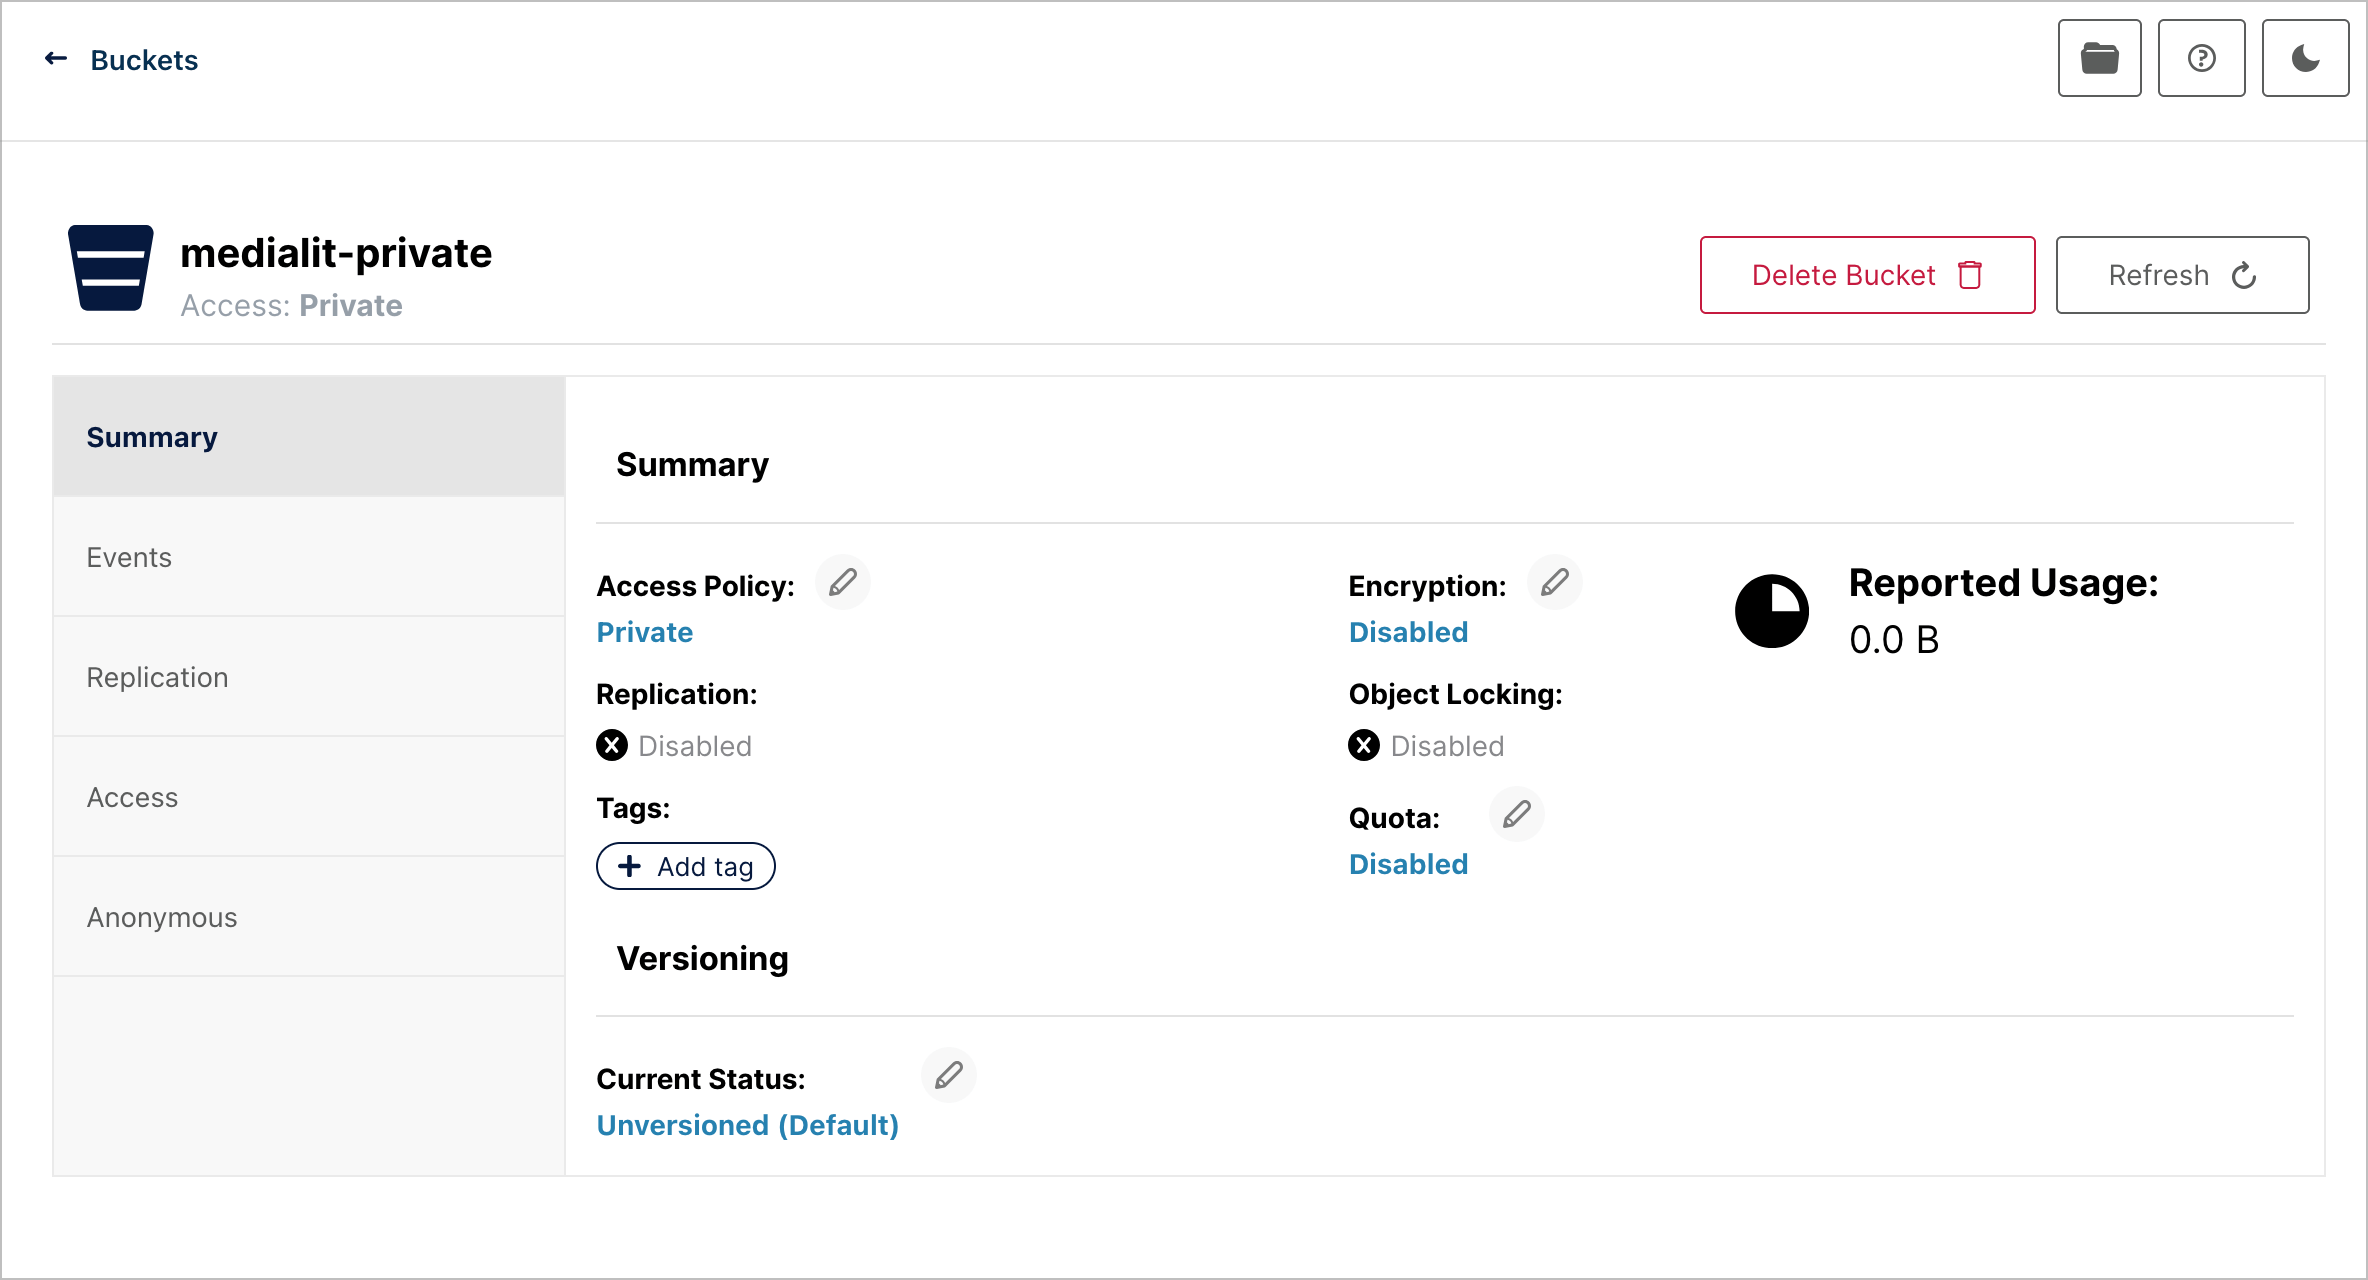
- Private bucket access settings: public access disabled.
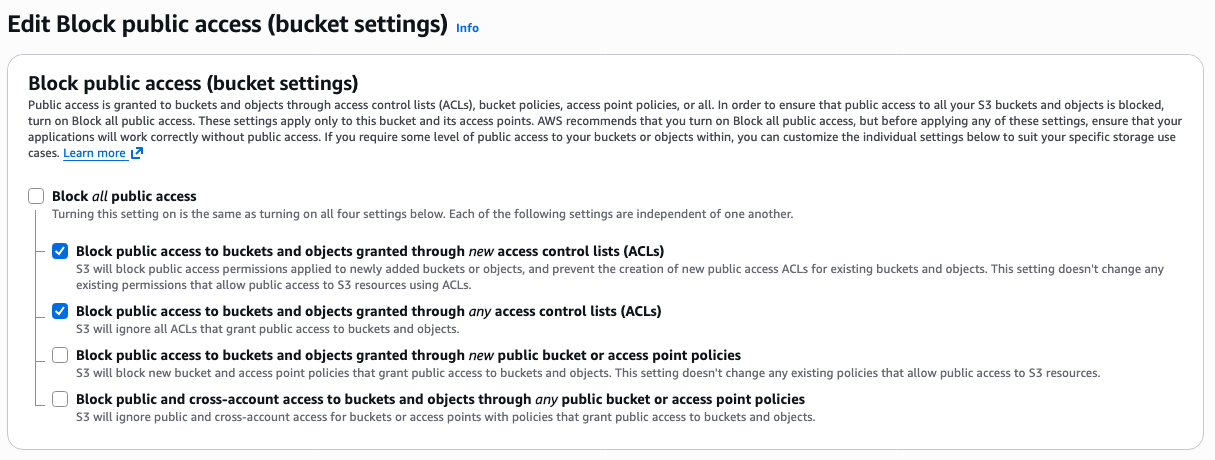
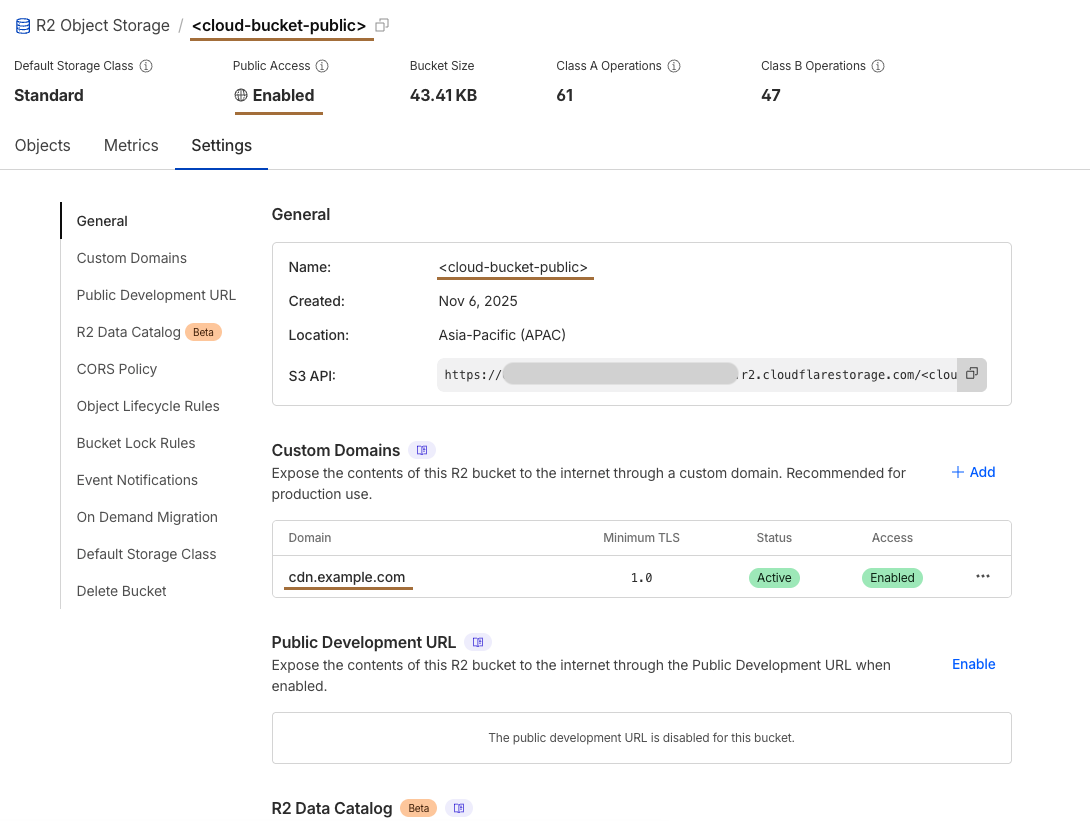
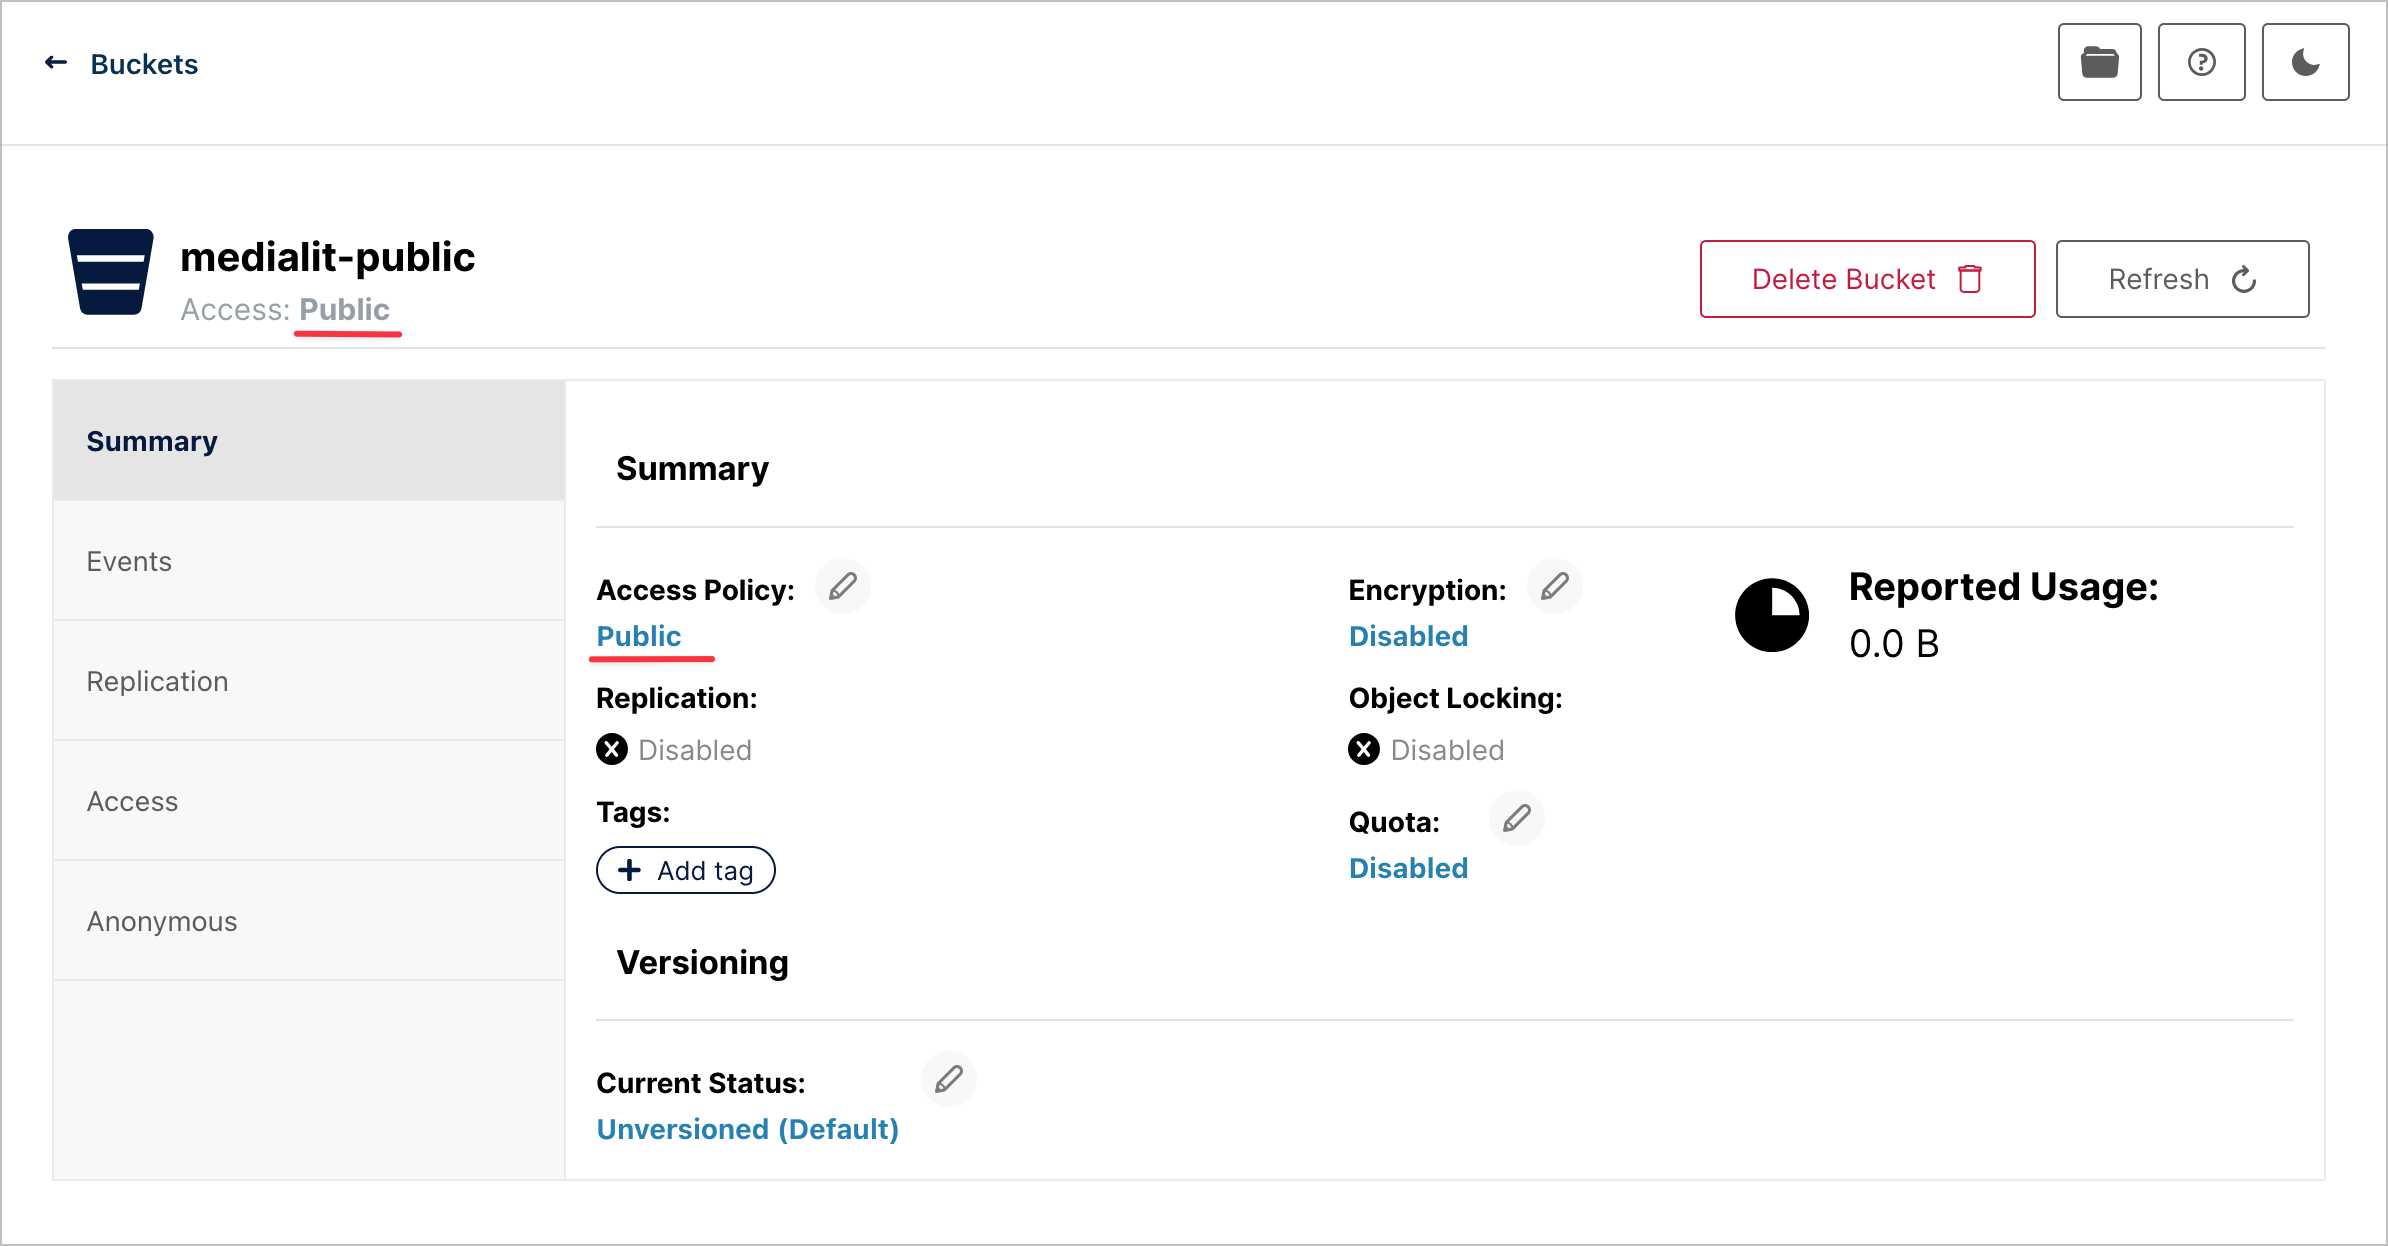
- Public bucket access settings: public access enabled.
Configuring storage
AWS S3
1. Configure the private bucket
2. Configure the public bucket
2.1 Allow public access
2.2 Configure bucket policy
{
    "Version": "2012-10-17",
    "Statement": [
        {
            "Sid": "PublicReadAccess",
            "Effect": "Allow",
            "Principal": "*",
            "Action": "s3:GetObject",
            "Resource": "arn:aws:s3:::<bucket>/<path-prefix>/*"
        }
    ]
}
3. Set environment variables
CLOUD_KEY=your_aws_access_key
CLOUD_SECRET=your_aws_secret_key
CLOUD_BUCKET_NAME=your_bucket_name
CLOUD_PUBLIC_BUCKET_NAME=your_public_bucket_name
CLOUD_REGION=ap-southeast-1
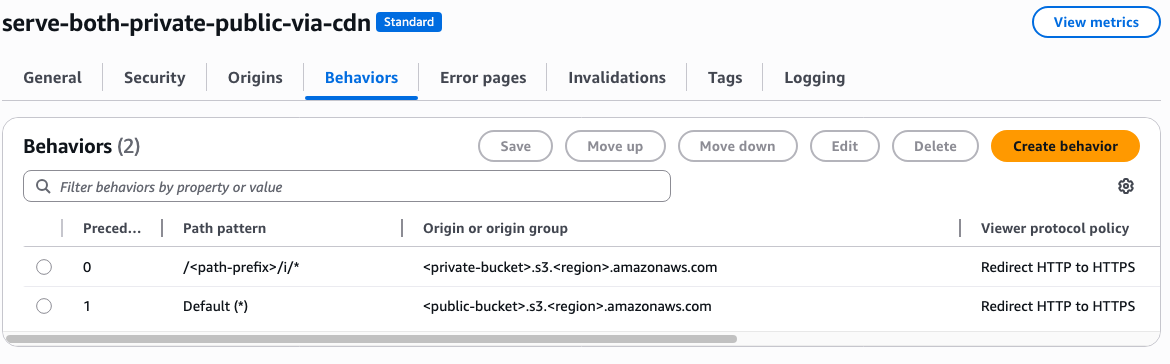
CDN_ENDPOINT=https://<bucket-name>.s3.<region>.amazonaws.comAdd CloudFront CDN
1. CloudFront distribution configuration
Add the public bucket to CloudFront as an origin.
2. Set environment variables
CDN_ENDPOINT=https://your-cloudfront-endpoint.example.comIn this setup, private URLs are served directly from S3. To serve private bucket content via CloudFront as well, keep reading.
3. Put the private bucket behind CloudFront
3.1. Add the private bucket to CloudFront
Add the private bucket to CloudFront as an origin.
3.2. Set environment variables
ACCESS_PRIVATE_BUCKET_VIA_CLOUDFRONT=true # Enables URL signing for CloudFront
CLOUDFRONT_PRIVATE_KEY="-----BEGIN PRIVATE KEY-----\nYOUR_PRIVATE_KEY_CONTENTS\n-----END PRIVATE KEY-----"
CLOUDFRONT_KEY_PAIR_ID=YOUR_KEY_PAIR_ID
Cloudflare R2
1. Configure the private bucket
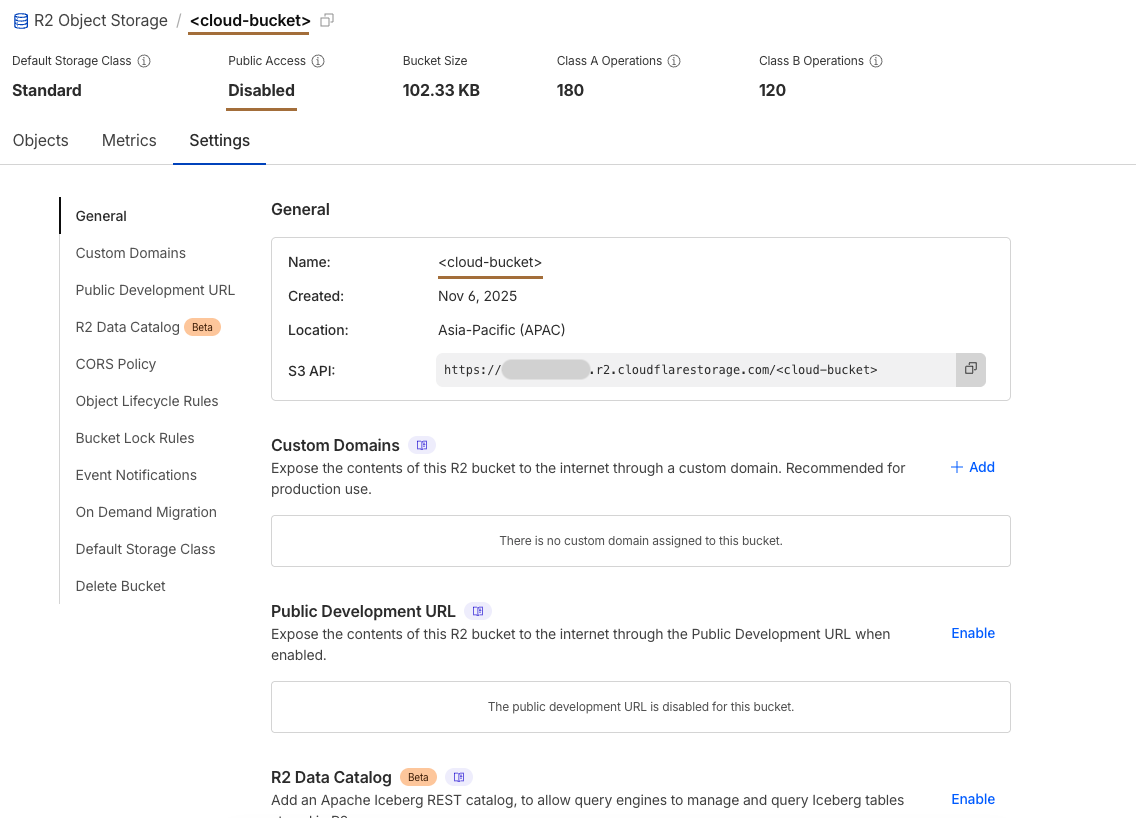
2. Configure the public bucket
3. Set environment variables
CLOUD_KEY=your_cloudflare_r2_access_key
CLOUD_SECRET=your_cloudflare_r2_secret_key
CLOUD_BUCKET_NAME=your_private_bucket_name
CLOUD_PUBLIC_BUCKET_NAME=your_public_bucket_name
CLOUD_REGION=auto
CLOUD_ENDPOINT=https://<your-account-id>.r2.cloudflarestorage.com
CLOUD_ENDPOINT_PUBLIC=https://<your-account-id>.r2.cloudflarestorage.com # Same URL as CLOUD_ENDPOINT
CDN_ENDPOINT=https://<your-cdn-endpoint>.r2.dev # For accessing public bucket content
DISABLE_TAGGING=true
In the Cloudflare setup, you cannot serve private bucket content through the CDN.
Minio
Minio by default uses Path Style (e.g. https://minio-api.example.com/bucket-name) while CourseLit/AWS S3 uses Virtual Hosted Style (e.g. https://bucket-name.minio-api.example.com)
In order for Minio to be used as object storage backend for MediaLit, additional DNS entry and certificates need to be generated.
1. Configure Reverse Proxy
A reverse proxy route for *.minio-api.example.com need to be created for Minio API.
Below example uses Traefik IngressRoute in Kubernetes to create a new Ingress route. Adjust accordingly for your Reverse Proxy:
apiVersion: traefik.io/v1alpha1
kind: IngressRoute
metadata:
  name: minio-api
spec:
  entryPoints:
    - websecure
  routes:
    - match: Host(`minio-api.example.com`)
      kind: Rule
      services:
        - name: minio-api
          port: 9000
    - match: HostRegexp(`^.+\.minio-api\.example\.com$`)
      kind: Rule
      services:
        - name: minio-api
          port: 9000
---
kind: Service
apiVersion: v1
metadata:
  name: minio-api
spec:
  type: ExternalName
  ports:
    - name: http
      port: 9000
  externalName: <ip address of minio VM>
2. Configure DNS: The following 2 DNS entries need to be created in DNS provider:
| DNS Name | Record Type | IP Address |
|---|---|---|
| minio-api.example.com | A | Reverse Proxy IP |
| *.minio-api.example.com | A | Reverse Proxy IP |
Certificates:
Additional SSL certificate for wildcard subdomain need to be created either in Minio VM (e.g CertBot), or in reverse proxy when using SSL termination.
Below example uses Cert Manager in Kubernetes to issue new certificate for reverse proxy.
Adjust accordingly for your reverse proxy or Minio VM certificate generator of choice.
apiVersion: cert-manager.io/v1
kind: Certificate
metadata:
  name: cluster-certificate
  namespace: cert-manager
spec:
  secretName: cluster-certificate-tls
  issuerRef:
    name: cloudflare-issuer
    kind: ClusterIssuer
  commonName: "*.example.com"
  dnsNames:
  - "*.example.com"
  - "minio-api.example.com"
  - "*.minio-api.example.com"
3. Configure private bucket
4. Configure public bucket
5. Set environment variables
CLOUD_KEY=your_minio_access_key
CLOUD_SECRET=your_minio_secret_key
CLOUD_BUCKET_NAME=your_private_bucket_name
CLOUD_PUBLIC_BUCKET_NAME=your_public_bucket_name
CLOUD_REGION=your_minio_region
CLOUD_ENDPOINT=https://<your_minio_api_endpoint>
CLOUD_ENDPOINT_PUBLIC=https://<your_minio_api_endpoint> # Same URL as CLOUD_ENDPOINT
CDN_ENDPOINT=https://<your_minio_api_endpoint> # For accessing public bucket content
In the Minio setup, you cannot serve private bucket content through the CDN.